

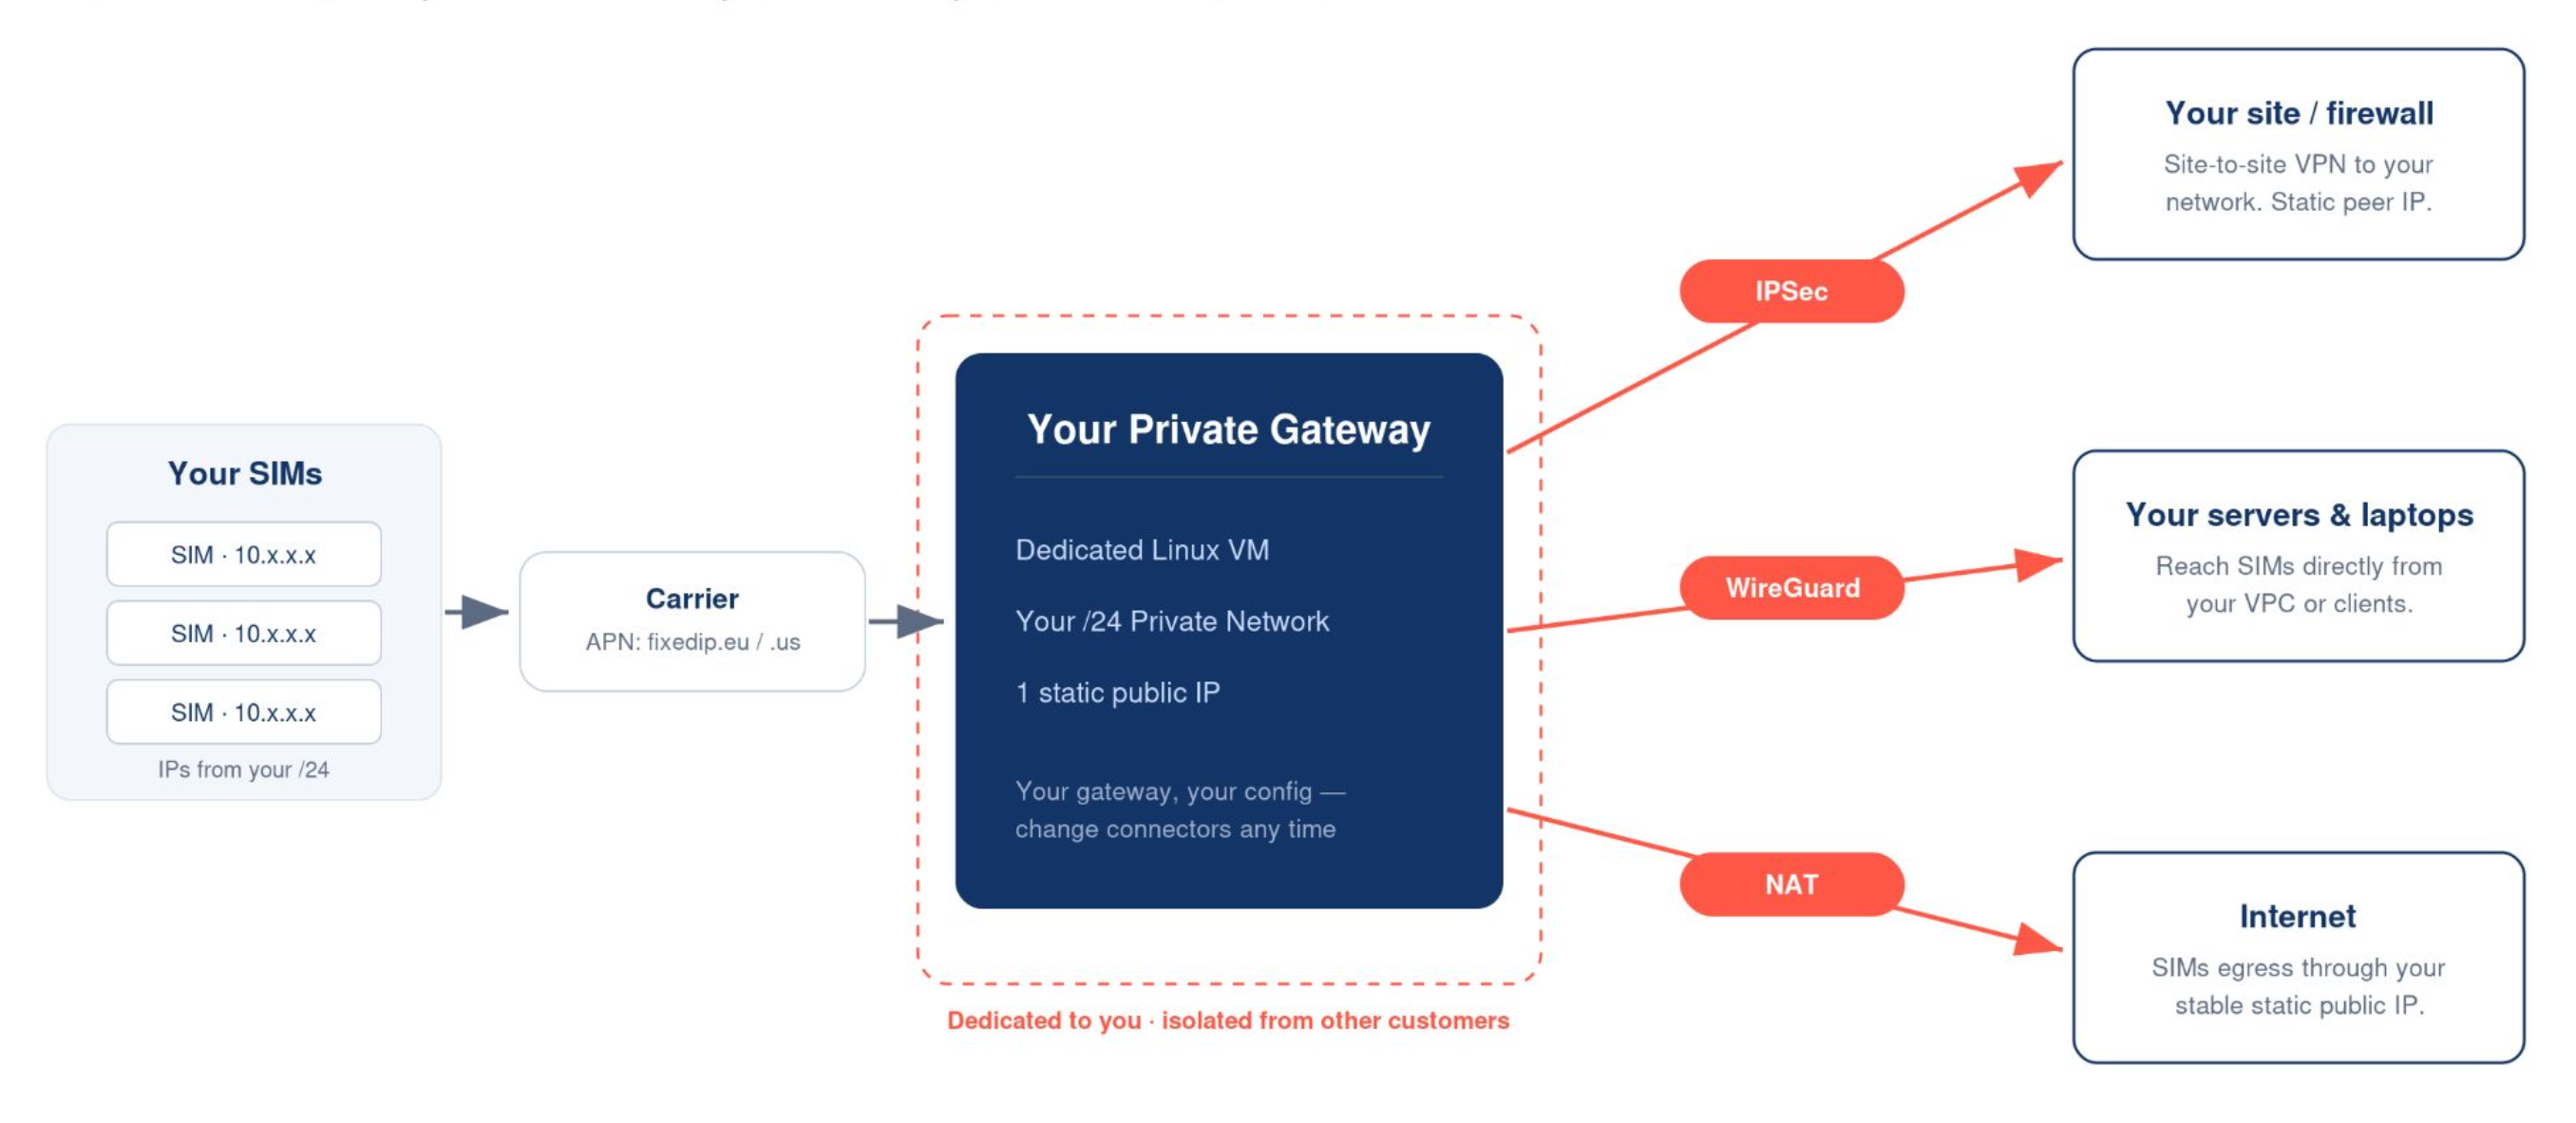
A private network gives a group of SIM cards static IP addresses on a gateway dedicated to your account. Every Simbase private network runs on its own private gateway, in a POP you choose, with a connector you choose. This article covers the new architecture of the Simbase Private networks and how to connect with WireGuard.
What does a private network get you?
A dedicated gateway, just for you. Your private network runs on its own isolated gateway, not a box shared with other customers. No noisy neighbors, no cross-customer outages.
Static IPs assigned at the carrier. Each SIM gets an IP from your own range directly from the carrier. There's no dynamic-to-static NAT step in the middle.
Your choice of connector, configurable per network:
WireGuard, recommended for most setups, see below.
IPsec, a two-way site-to-site tunnel into your own network, see IPsec.
NAT, the gateway gives SIMs a public-facing IP without running a VPN tunnel.
Your choice of POP. Frankfurt (EU) or Virginia (US).
For background on what a VPN does and when one is worth setting up, see VPN for IoT.
Deploying a private network
Deploying and assigning SIMs to a private network is easy:
Navigate to Private Networks in your Simbase dashboard.
Click Create Network.
Name your network, select the Breakout location and SIM Profile.
Deploy the network.
To assign SIMs to your network:
Access the newly created private network.
Go to SIM cards.
Click on Assign SIMs.
Look up the SIMs you want to add to the private network and click on "Assign Selected".
Connect with WireGuard
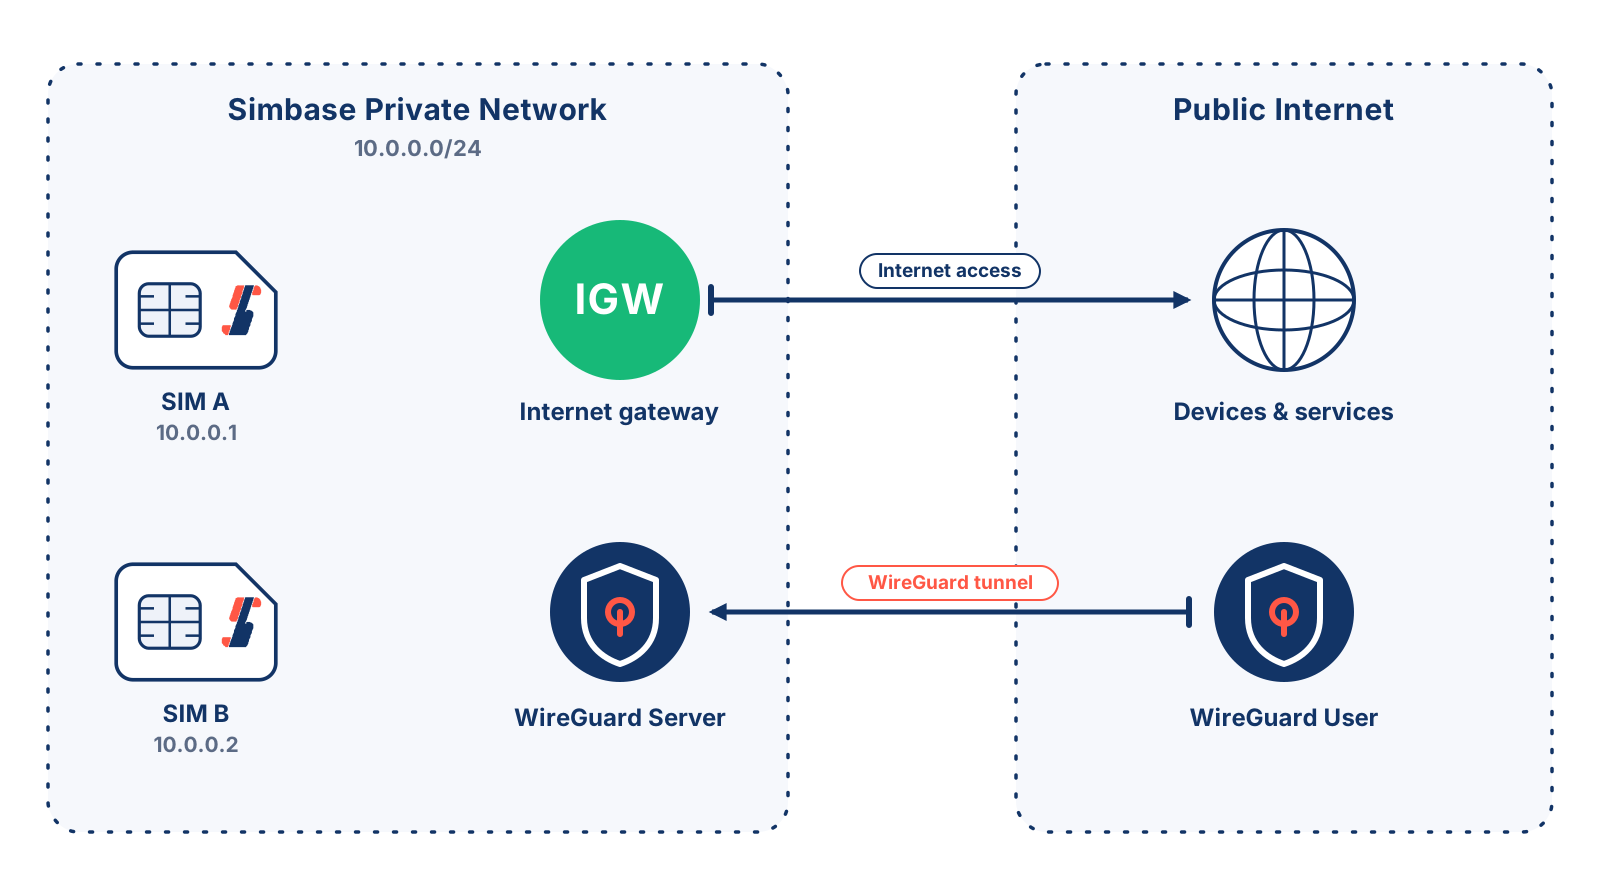
Getting connected is copy-paste: Simbase generates a ready-made config for your private network. Install the client, create an empty tunnel, paste the config, and activate.
A config looks something like this:
1. Download your config files
Your network's email contains five Bitwarden Send links and one password. Each link gives you one ready-to-use WireGuard config as a .txt file, one per device or client you want to connect.
For each link:
Open the email and copy the password shown in it.
Click the Bitwarden Send link. It opens a Bitwarden page in your browser.
Paste the password into the password field and click Continue.
Click Download. A
.txtfile is saved to your computer, for examplewireguard_profile_1.txt.Repeat for the remaining links.
Open one of the downloaded files in a text editor to confirm it looks like a config, with an [Interface] section and a [Peer] section.
2. Install the WireGuard app
Windows, macOS, or Linux: wireguard.com/install.
iPhone or iPad: the App Store.
Android: Google Play.
Open the app once it's installed.
3. Add a tunnel (desktop)
Open one of your downloaded
.txtfiles in a text editor (Notepad on Windows, TextEdit on macOS).Select everything and copy it.
In the WireGuard app, click Add Tunnel and choose Add empty tunnel.
Delete everything in the new editor that opens.
Paste your config.
Give it a recognizable name, for example
Simbase private network 1.Click Save.
Select the tunnel in the list and click Activate.
Within a few seconds the status turns Active, and you'll see a "Latest handshake" time and bytes sent and received. That means you're connected.
4. Add a tunnel (mobile)
Save the .txt file to your phone, open the WireGuard app, tap +, choose Create from file or archive, and select the file. Then tap the tunnel to turn it on.
If your phone won't let you pick a .txt file, rename it so it ends in .conf first.
5. Check it's working
In the WireGuard app, confirm the tunnel shows Active, with a recent Latest handshake and bytes sent and received both climbing.
With the tunnel up, ping one of your SIMs on its static IP, taken from the per-SIM list Simbase sent you.
Then try the service you actually need, such as SSH or the device's web interface. Some devices don't answer ping even when they're reachable.
If a SIM doesn't respond:
Check the SIM is Enabled and has attached to the network since you changed the APN. A device that hasn't reconnected is still using the old one. See SIM state.
Confirm the device is set to fixedip.eu or fixedip.us, matching the POP your gateway runs in.
Check the device's own firewall. The tunnel can be up and healthy while the device itself drops the traffic.
Teltonika routers, by SMS
Teltonika routers accept remote APN changes by SMS, so you don't need physical access or a VPN session:
Replace
<router_password>with the router's SMS password.Set under Services → Mobile Utilities → SMS Utilities.
Use
fixedip.usinstead offixedip.euif your network is in the US POP.Send the SMS to the SIM through the dashboard. The router applies the change and reconnects automatically.
Other vendors
Most cellular routers and modules support remote APN updates through their management platform, for example Cradlepoint NetCloud, Sierra Wireless AirLink, Robustel RCMS, or InHand iManager. If you use a fleet management tool, push the APN change there first and test on a small group before rolling out to the full fleet.
For embedded modules (Quectel, Telit, Sierra, u-blox), use an AT command over your existing serial or MQTT control channel:
Common questions
Yes, each private network costs $/€/£ 3 per day and includes a /24 subnet.
Yes. NAT is one of the three connector choices, alongside WireGuard and IPsec. With NAT, the gateway gives your SIMs a public-facing IP without a tunnel.
No limit. Your setup email includes five ready-made configs, so contact support if you need more than that.
No, OpenVPN can no longer be used. We have moved away from OpenVPN and started using WireGuard as it provides better performance and stability.
Related
IPsec — set up or migrate a two-way IPsec tunnel
VPN for IoT — when a VPN is worth the added complexity
Public IPs — for inbound reachability to a single SIM without a private network
Network Address Translation (NAT) — what it means for IoT
Compatibility check — ensure your device is compatible before deployment


© 2026 Simbase. All rights reserved.